


Views: 0 Author: Site Editor Publish Time: 2026-06-29 Origin: Site


Procurement and packaging engineers face constant tension on the production floor. You must balance raw material expenses against unexpected production bottlenecks. Historically, upgrading standard substrates felt like a purely aesthetic choice. Today, it stands as a strategic operational decision. Evaluating these materials requires looking beyond simple per-sheet metrics. You must assess print fidelity, line efficiency, and overall manufacturing speed.
Outdated materials often cause hidden delays. We will explore how advanced substrates eliminate secondary finishing steps. You will learn the exact operational differences, key performance metrics, and practical selection criteria. This guide delivers the actionable insights you need. It helps you optimize production lines, reduce waste, and maintain exceptionally high quality standards.
Traditional boards require secondary, post-print coating processes (UV, aqueous, or film lamination) to achieve specific barrier or visual properties, increasing lead times.
A pre coated board arrives factory-finished with functional or aesthetic layers, reducing press passes and offline finishing costs.
While pre-coated materials carry a higher upfront unit cost, they mitigate scrap rates and structural inconsistencies associated with secondary coating applications.
Choosing between the two depends on run size, existing converting equipment capabilities, and specific compliance or barrier requirements.
Evaluating raw materials requires understanding the exact baseline. Traditional, untreated paperboard presents inherent structural limitations. These standard boards feature high surface porosity. They absorb ink rapidly during the printing process. This absorption forces operators to run presses slower or apply excess ink. Both workarounds hurt line efficiency.
Untreated substrates also exhibit extreme vulnerability to moisture. Changes in ambient plant humidity cause warping. Warped pallets jam automated feeding systems. You experience unexpected downtime. Operators spend hours adjusting machine tension to accommodate inconsistent sheet profiles. These structural inconsistencies ruin tight production schedules.
Relying on secondary finishing creates massive hidden bottlenecks. Operators must apply aqueous, UV, or film laminations offline. This introduces longer drying times. Moving pallets between the press room and the finishing department adds logistical strain. Each physical movement increases scrap risk. You lose valuable floor space to staging areas. Wet sheets sit waiting for curing stations. Dust contamination ruins entire batches during these staging periods. Traditional workflows sacrifice speed for perceived unit savings.
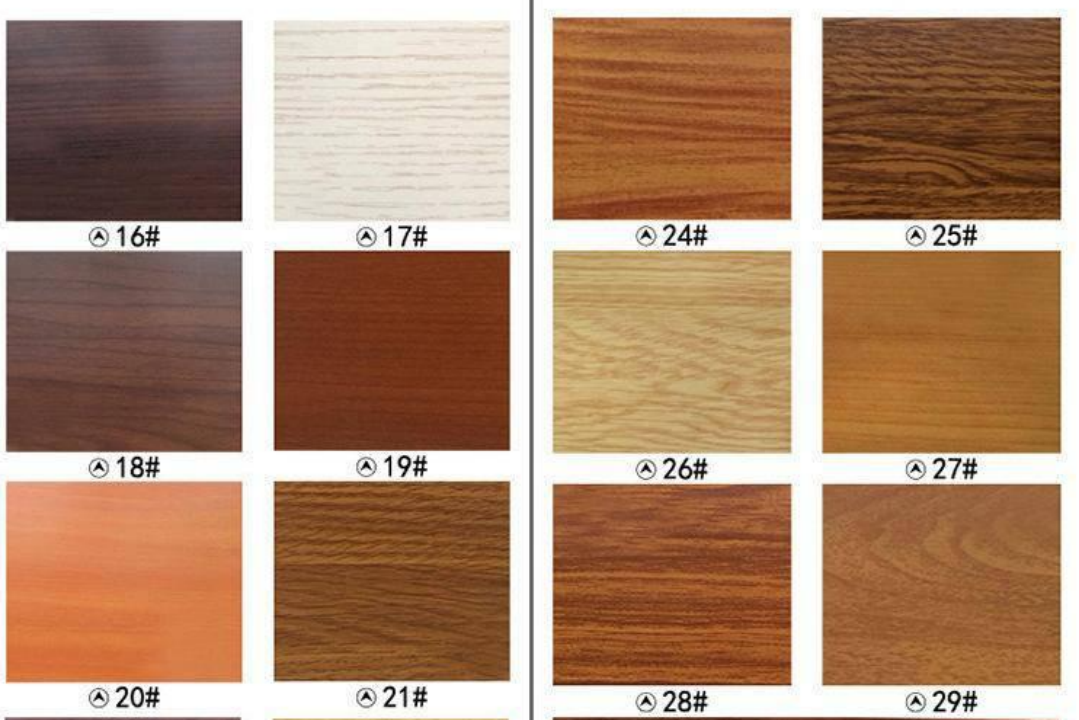
Engineered substrates fundamentally change the manufacturing workflow. A Pre Coated Board arrives at your facility fully finished. Paper mills apply functional or aesthetic layers during the initial manufacturing process. They use highly controlled, sterile environments. This factory application ensures perfect uniformity across every single roll or sheet.
These layers serve multiple distinct purposes. Some provide extreme moisture barriers. Others deliver grease resistance for food applications. Many enhance visual appeal. For highly specialized architectural or premium retail applications, a decorative pre coated board offers unique textures. It mimics wood grain, metallic finishes, or soft-touch surfaces directly out of the box.
You bypass the finishing department entirely. The material moves straight from the printing press to the die-cutting station. You eliminate intermediate curing processes. Operators spend less time matching dyne levels on the press. The factory surface tension remains perfectly optimized for rapid ink adhesion. This predictability gives you ultimate control over your production schedule.
The differences become stark when analyzing the actual manufacturing steps. Traditional workflows demand reactive adjustments. Treated materials allow proactive scheduling. We can visualize these operational differences by mapping the exact steps required for a finished product.
Process Comparison Chart: Traditional vs. Pre-Treated | ||
Production Phase | Traditional Board Workflow | Pre-Treated Board Workflow |
|---|---|---|
Pre-Press Prep | Requires complex ink density adjustments to counter absorption. | Standard profile loading. Surface holdout ensures predictable color. |
Printing | Slower run speeds. High risk of dot gain and muddy colors. | Maximum press speeds. Crisp dot structures and vibrant colors. |
Drying/Curing | Requires extensive staging space and long wait times. | Immediate inline curing. Sheets move instantly to next phase. |
Finishing | Requires offline lamination or UV coating passes. High scrap risk. | Finishing step completely eliminated. Factory surface suffices. |
Converting | Brittle secondary coatings often crack during scoring. | Flexible, integrated factory layers score cleanly. |
You see the immediate elimination of entire production phases. Scrapping the offline finishing step transforms your throughput. You stop paying operators to monitor curing lamps. You stop repairing lamination jams. The streamlined workflow maximizes equipment utilization rates.
Surface chemistry dictates print quality. Uncoated fibers act like microscopic sponges. They pull ink pigments deep into the substrate core. This capillary action destroys image sharpness. Colors lose their vibrancy. Text edges appear fuzzy. You cannot achieve premium visual standards using raw fibers.
Factory-applied surfaces keep the ink pigment sitting perfectly on top. We call this phenomenon "ink holdout." Superior ink holdout delivers immediate aesthetic improvements. You will notice significant upgrades across several visual metrics:
Reduced Dot Gain: Halftone dots maintain their exact intended size. The image remains sharp and photorealistic.
Higher Color Density: Pigments do not sink. They reflect maximum light, creating deeper blacks and richer brand colors.
Consistent Gloss Levels: The uniform surface prevents uneven, blotchy finishes common on porous materials.
Faster Make-Ready Times: Press operators hit target colors on the first few pulls. This saves hundreds of setup sheets.
You protect brand integrity by utilizing engineered surfaces. A high-end cosmetic box or premium electronics sleeve demands absolute perfection. Treated materials guarantee this perfection across multi-million piece runs. You eliminate the dreaded color shift between the first and last pallet.
Visuals matter, but structural performance dictates survival in the supply chain. Products face harsh environments. They endure freezing trucks, humid warehouses, and rough handling. Traditional boards fail quickly under these conditions. They absorb ambient moisture, lose rigidity, and collapse.
Advanced substrates incorporate extruded polymers or specialized clay mixtures. These integrated layers act as impenetrable shields. You must match the specific barrier type to your exact environmental hazards. Consider these specialized functional layers:
Moisture Barriers: Essential for refrigerated goods. The layer prevents condensation from weakening the core fibers.
Grease and Oil Barriers: Crucial for industrial parts or food service. They stop oils from seeping through and ruining the exterior graphics.
Oxygen Barriers: Required for extending shelf life. They prevent air ingress, protecting sensitive contents.
Fire-Retardant Layers: Used in construction or specialized architectural displays. They meet strict safety compliance standards.
Applying these barriers offline via film lamination introduces structural weaknesses. Laminated films often delaminate under extreme temperature shifts. Factory-integrated layers bond at a molecular level. They never peel, flake, or separate. Your product arrives at the end user looking pristine.
Transitioning materials requires careful planning. Many engineers make critical errors during the initial pilot phase. They assume all treated substrates behave identically. This assumption leads to costly production failures. You must respect the specific chemistry of your chosen material.
Do not ignore your existing ink systems. UV inks behave differently than oxidative inks. A factory surface optimized for one might reject the other. Mismatched surface tension causes ink flaking. You will ruin entire runs if you fail to match dyne levels. Always consult your ink supplier before locking in a new material specification.
Avoid the trap of over-specifying. Do not request an extreme moisture barrier if the product ships exclusively in climate-controlled environments. Over-engineering simply inflates your raw material budget. Analyze the actual supply chain journey. Define the exact minimum viable performance requirements. Select a board meeting those specific needs without unnecessary extras.
Watch out for score cracking during the die-cutting phase. Highly glossy, rigid factory layers sometimes behave brittlely under pressure. You must adjust your scoring matrices. Operators should widen the score channels slightly. This accommodation prevents the top layer from fracturing when folded into a 90-degree angle.
Implementing a successful transition demands a rigorous testing framework. You cannot rely on spec sheets alone. Real-world machine variables always behave unpredictably. Follow a strict validation protocol to ensure seamless integration.
First, run a comprehensive pilot test. Procure a small batch of the target material. Run it through every single machine on your floor. Monitor the press speed. Check the die-cutter for clean edges. Observe the folder-gluer for proper adhesion. Standard adhesives sometimes struggle to grip treated surfaces. You might need to switch to a specialized hot-melt glue.
Second, implement standardized dyne testing. Equip your press operators with dyne pens. They must verify the surface tension of every incoming roll before loading it onto the press. This simple five-second check prevents massive ink adhesion failures. It empowers operators to catch defective batches immediately.
Finally, recalibrate your drying lamps. Pre-treated surfaces dry differently than raw fibers. If you leave UV lamps at their traditional settings, you might scorch the factory layer. Lower the lamp intensity. Increase the belt speed. Find the new optimal curing window for your upgraded material.
Even well-planned transitions encounter occasional hiccups. You need a rapid response plan for common mechanical issues. This troubleshooting matrix helps operators resolve problems quickly. It keeps the line moving and minimizes scrap.
Quick Reference: Troubleshooting Matrix | ||
Symptom | Probable Cause | Immediate Action Step |
|---|---|---|
Ink flaking off the surface | Low surface dyne level / Mismatched ink | Test dyne level. Switch to high-adhesion ink formulation. |
Cracking along fold lines | Scoring matrix too tight / Channel too narrow | Widen the scoring matrix. Check the grain direction. |
Glue flaps popping open | Adhesive failing to penetrate the treated layer | Switch to aggressive hot-melt or mechanically abrade the flap. |
Blistering under UV lamps | Curing temperature set too high | Reduce lamp wattage. Increase press speed slightly. |
Empower your operators with this knowledge. When they understand the material science, they troubleshoot intuitively. They stop blaming the machine and start adjusting the parameters.
Switching from traditional substrates to advanced engineered boards transforms your operational efficiency. You instantly eliminate the hidden bottlenecks plaguing secondary finishing departments. Operators reclaim valuable floor space and reduce dangerous staging delays. You guarantee superior print fidelity, brilliant color reproduction, and structural resilience across every run.
Take action by auditing your current production line. Identify the exact amount of time lost to offline coating or lamination processes. Calculate your current scrap rates associated with post-print finishing. Order sample rolls of treated materials and execute a pilot run. Compare the line speeds, ink mileage, and final visual quality. You will quickly discover the strategic advantage of factory-finished substrates.
A: Yes, they often require specific ink formulations. The treated surface prevents ink absorption, meaning standard oxidative inks may dry too slowly. You should transition to UV-curable or specialized synthetic inks to ensure proper adhesion and prevent smudging during high-speed runs.
A: They generally cut very cleanly, but the integrated top layer can be brittle. Operators must carefully calibrate the scoring matrices. Widening the score channels slightly prevents the treated surface from cracking when folded. Always align critical folds with the natural grain direction.
A: Yes. A factory-finished substrate replaces the need for offline lamination. The mill applies the protective or visual barrier during manufacturing. This eliminates the curing time, reduces handling damage, and bypasses the entire secondary finishing bottleneck on your floor.
A: Standard water-based glues rely on porous fibers to create a mechanical bond. Treated surfaces block this penetration. You must use specialized hot-melt adhesives designed for low-surface-energy substrates, or mechanically skive (abrade) the glue flap before application.
A: Dyne testing measures the surface tension of a material. It dictates how well ink or glue will wet out and adhere. You must test incoming treated boards to ensure their surface energy matches your ink specifications, preventing catastrophic flaking on the press.


